


05.09.26
How to Increase Basement Ceiling Height in Older Toronto Homes
Many older Toronto homes were built with basements intended mainly for storage, laundry, furnaces, or utilities. In neighborhoods filled with century homes, semis, and narrow lots, it is common to find basements with less than comfortable headroom. Beams, ducts, pipes, insulation, and finished flooring can reduce the usable height even further.
Increasing basement ceiling height can turn a cramped lower level into a family room, office, gym, guest area, or potential secondary suite. However, the work is not as simple as removing the existing concrete floor and digging deeper. Excavation can affect the foundation, nearby structures, drains, moisture control, and the overall stability of the house.
For many downtown Toronto properties, the most effective solution is basement lowering through underpinning, benching, or a carefully engineered combination of both. The project should begin with accurate measurements, a realistic finished-height target, professional drawings, permits, and a coordinated plan for waterproofing, plumbing, insulation, heating, and finishing.
Why Older Toronto Basements Have Low Ceilings
Older basements were often not designed as primary living areas. Builders excavated only enough space for storage and mechanical equipment, leaving a shallow foundation and limited headroom. Later renovations may have made the problem worse by adding subfloors, low bulkheads, suspended ceilings, or poorly routed services.
Common causes of low basement ceiling height include:
- Shallow original footings
- Thick or uneven concrete slabs
- Low beams, ducts, pipes, and wiring
- Raised subfloors installed over cold or damp concrete
- Previous structural repairs
- Sloping or settled floors
- Ceiling finishes installed below the joists
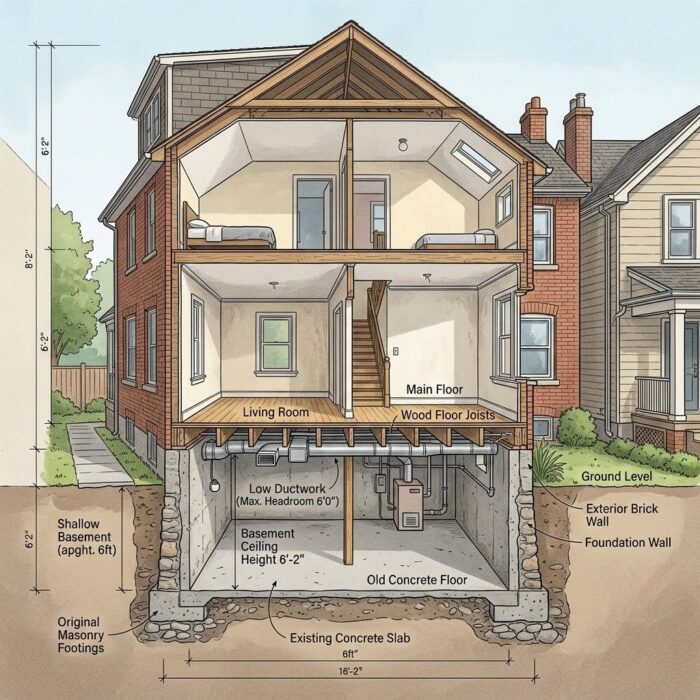
The first assessment should measure from the slab to the underside of the joists, beams, and lowest obstruction. It should also account for the thickness of the future floor assembly. A new basement floor may include drainage stone, insulation, vapor control, concrete, radiant heating, and finished flooring.
This distinction matters because homeowners need to plan for finished headroom, not just the depth reached after excavation. A project can gain several structural inches and still feel low if those inches are later consumed by flooring, lighting, or mechanical systems.
Choose a Finished Basement Ceiling Height First
The planned use of the basement should guide the target height. A storage room has different requirements from a finished recreation area, bedroom, or legal secondary suite.
Ontario guidance states that a basement second unit may be permitted with a ceiling height of 1.95 meters across the required floor area, including the route to the exit. That figure should not be treated as a universal design target. The applicable requirements depend on the building, intended use, permit scope, existing conditions, and current code provisions. A qualified designer, engineer, or building professional should confirm the requirements for the specific property.
Many homeowners choose to aim higher than the minimum, where the structure and budget allow. Extra headroom can make the space feel more open while leaving room for lighting, insulation, ducts, and ceiling finishes.
Before excavation begins, the drawings should account for:
- Desired finished ceiling height
- New slab and flooring thickness
- Under-slab drainage and insulation
- Beams, columns, and stairs
- Plumbing slopes and drain elevations
- Heating ducts and electrical services
- Fire and sound separation
- Windows, exits, and planned room use
- Radiant floor heating, if included
A detailed wall section should show the existing footing, proposed footing, new slab elevation, drainage, insulation, and finished floor. This helps prevent costly changes after the structural work has started.
Underpinning vs. Benching for Basement Lowering
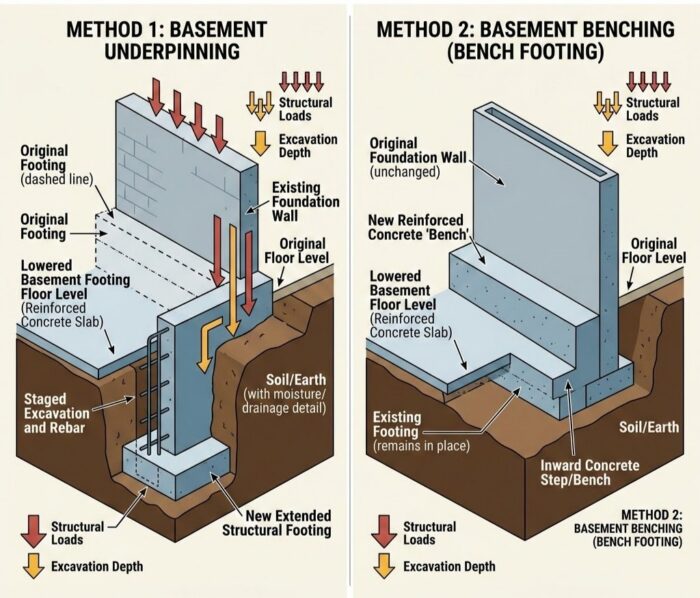
“Basement lowering” describes the goal of creating a lower floor. Underpinning and benching are different structural methods used to achieve that goal.
| Method | How It Works | Main Benefit | Main Limitation |
| Underpinning | New footing sections are built below the existing foundation before the interior is excavated | Creates substantial headroom while preserving more floor area | Requires engineering, permits, staged excavation, and specialized work |
| Benching | Soil is left beside the foundation and covered with a reinforced concrete ledge | Avoid excavating directly below some existing footings | Reduces usable floor area around the room perimeter |
| Combined method | Underpinning is used in some areas, and benching in others | Can address difficult access, foundations, or neighboring conditions | Produces a more complex layout and design |
| Service reconfiguration | Ducts, pipes, lights, and ceilings are moved without lowering the slab | Less invasive and may recover a few inches | Cannot solve a genuinely shallow foundation |
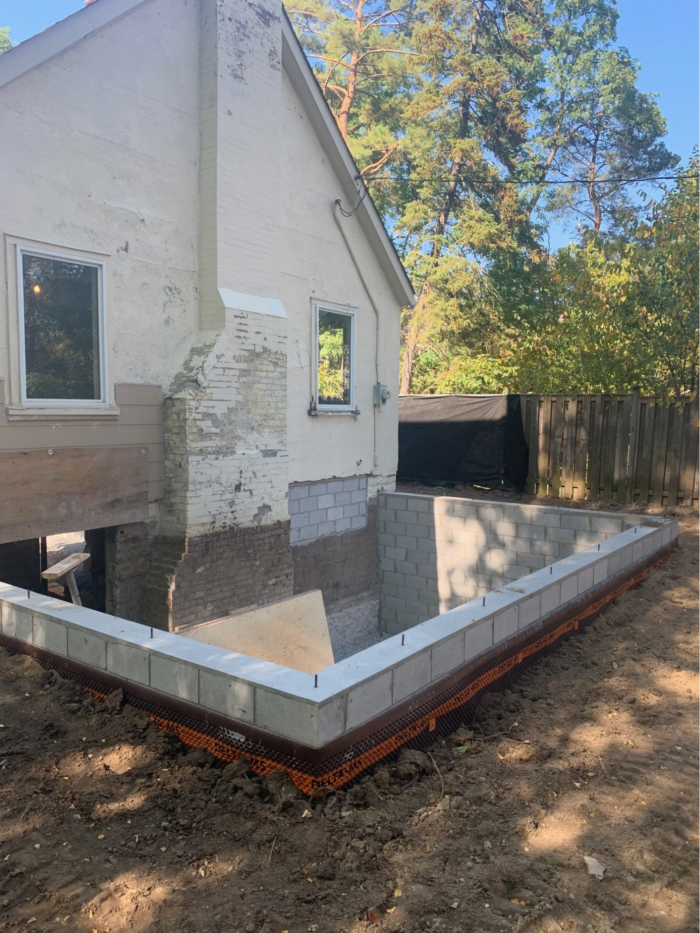
For homeowners seeking maximum usable space, basement underpinning is often the preferred option. It extends the foundation downward so the interior soil and slab can be lowered without creating a large ledge around the basement.
Benching may be suitable in some homes, but the ledge can interfere with furniture, bathrooms, cabinetry, stairs, and circulation. In a narrow Toronto basement, the loss of floor area may be significant.
A professional assessment for basement lowering should compare the effect of each method on structure, budget, usable space, drainage, and the final room layout.
How Basement Underpinning Creates More Headroom
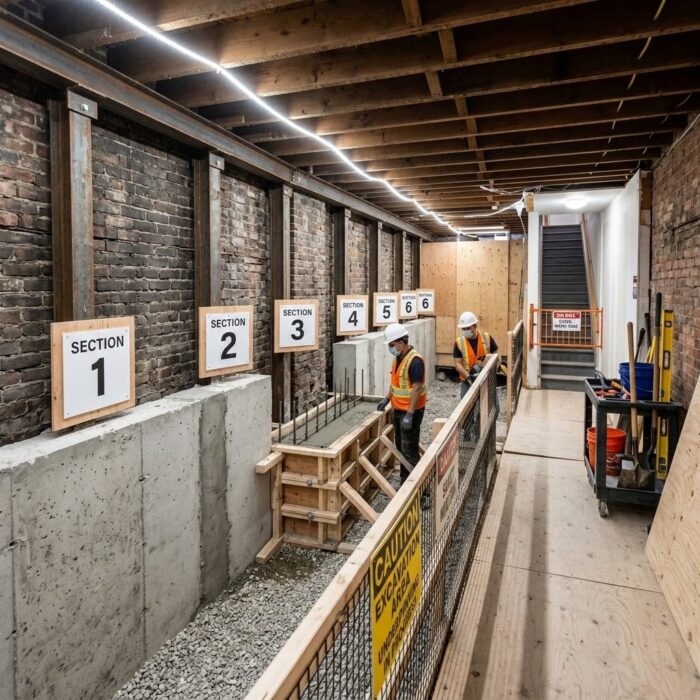
Underpinning is performed in a controlled sequence so the entire foundation is never unsupported at once. The exact process is determined by the engineer, but a typical project includes the following stages.
1. Assess the Existing Structure
The contractor and engineer review the foundation walls, footings, slab, beams, columns, drains, plumbing, access, and nearby buildings. Older houses may contain stone, brick, block, rubble, or mixed foundation materials.
2. Prepare Structural Drawings
The design identifies the proposed depth, footing dimensions, underpinning sequence, reinforcement, concrete requirements, and any special conditions. It may also include a walkout, new posts, beams, drains, or plumbing changes.
3. Remove the Existing Slab
The concrete floor is broken and has been removed. This exposes the soil and confirms conditions that may not have been visible during the initial inspection.
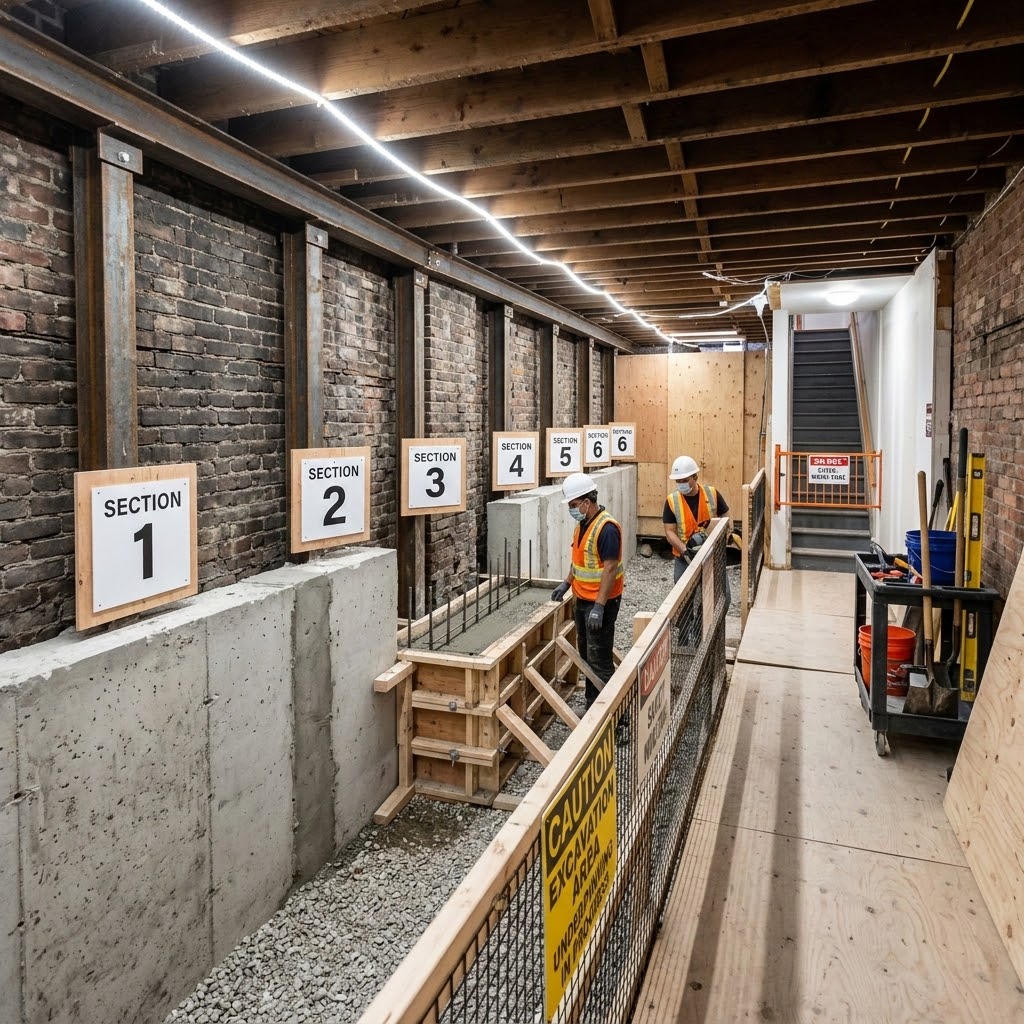
4. Excavate and Pour Sections in Sequence
Small sections beneath the footing are excavated according to the engineered numbering plan. Each section is formed and filled before nearby sections are opened. This transfers the load to deeper support in stages.
5. Excavate the Basement Interior
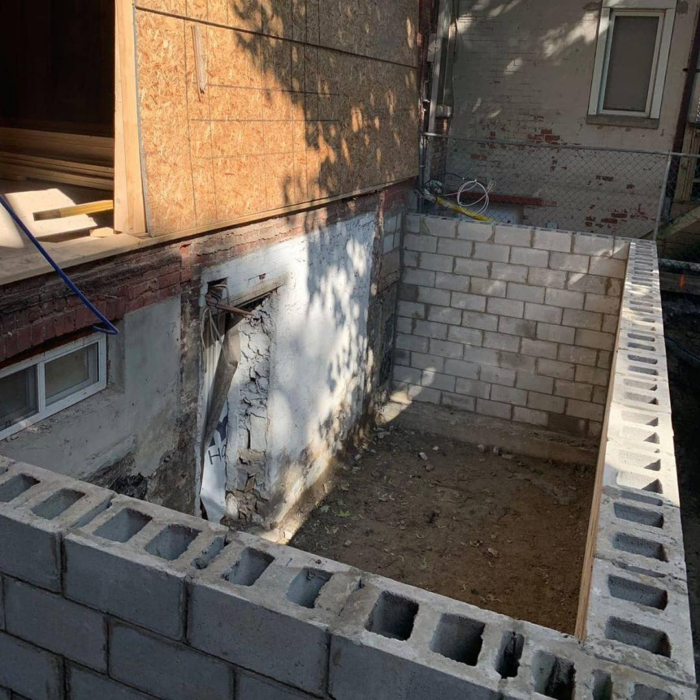
After the structural sections are complete, the remaining soil is removed to the planned elevation. Access is important in downtown Toronto, where soil may need to pass through narrow side yards, windows, or temporary openings.
6. Install Drainage and Underground Systems
Before the slab is poured, the project may include drainage stone, insulation, vapor control, plumbing rough-ins, sump components, backwater protection, and waterproofing.
7. Pour the Slab and Complete the Renovation
The new slab is installed at the designed elevation. Framing, electrical, plumbing, heating, drywall, and flooring can then proceed.
The City of Toronto defines underpinning as increasing the depth of an existing foundation by constructing new footings beneath the existing footings. It also requires professional engineering involvement when the proposed foundation is below an adjacent building’s footing and within the soil’s angle of repose.
Homeowners planning underpinning work in Toronto should ask how the contractor will manage the excavation sequence, engineer reviews, inspections, concrete placement, soil removal, and site protection.
Toronto Permits and Neighbouring-Property Considerations
Basement underpinning requires a building permit in Toronto. The City also identifies basement entrances and new secondary suites as permit projects.
A permit package may include:
- Existing and proposed floor plans
- Foundation and building sections
- Structural underpinning details
- Numbered excavation stages
- Beam, post, and footing information
- Plumbing or drain drawings
- Walkout or basement entrance details
- Professional schedules and review commitments
Toronto’s application guidance asks that drawings show foundation information, proposed underpinning, structural framing, support columns, and the numbered sequence of work.
Neighboring properties are especially important in downtown areas with semis, row houses, party walls, shallow setbacks, and closely spaced foundations. The engineer may need to consider footing depth, soil behavior, temporary support, vibration, excavation limits, and the angle of repose.
Inspections must also be built into the schedule. Structural work, drains, or other components should not be covered until the required inspection has taken place. A qualified basement underpinning Toronto contractor should explain who prepares the drawings, who submits the permit, when the engineer attends, and how unexpected site conditions will be documented.
Coordinate Waterproofing, Plumbing, and Heating
Basement lowering creates an opportunity to rebuild the lower level from below the slab upward. Structural work should therefore be coordinated with moisture control, drainage, utilities, and comfort systems.
Waterproofing and Moisture Control
Moisture problems should be addressed before finishes are installed. CMHC explains that mould requires moisture and nutrients, and that dampness inside materials may be enough for growth even when water is not visible.
Depending on the property, the work may include interior drainage, exterior waterproofing, wall membranes, a sump system, crack repairs, or improved surface drainage. A waterproofing company in Toronto homeowners hire should coordinate these details with the new footing and slab.
RockBottom Underpinning also provides a dedicated basement waterproofing service for projects that need moisture protection as part of the wider renovation.
Plumbing and Drain Elevations
Lowering the floor may place new fixtures below the existing building drain. Bathrooms, laundry rooms, kitchens, and floor drains must be planned around pipe slopes and connection points. Some projects may require drain modifications, backwater protection, or sewage-ejection equipment.
Insulation and Floor Heating
A deeper basement is not automatically a warmer basement. The new slab assembly should include appropriate moisture control and insulation. When the floor is being rebuilt, homeowners may also consider radiant floor heating. Planning the heating system, controls, insulation, and flooring together helps avoid unnecessary floor buildup.
Mechanical and Electrical Layout
Low ducts and pipes can erase some of the headroom gained through excavation. Mechanical services should be reviewed early so they can be rerouted, consolidated, or placed between joists where permitted. Recessed lighting and carefully located bulkheads can also preserve a cleaner ceiling line.
Cost Factors and Mistakes to Avoid
There is no single reliable price for increasing basement ceiling height. Each older Toronto house has different structural, soil, drainage, and access conditions.
Important cost factors include:
- Linear footage of foundation
- Desired excavation depth
- Foundation material and condition
- Soil and groundwater conditions
- Access for equipment and soil removal
- Proximity to neighboring foundations
- New beams, posts, or structural repairs
- Plumbing and drain relocation
- Waterproofing and sump requirements
- Walkout or entrance construction
- Insulation, heating, and slab design
- Engineering, permits, and inspections
- Level of finishing after structural work
The City calculates some permit fees according to project type and scope, but permit charges are only one part of the budget. Engineering, excavation, concrete, waste removal, plumbing, waterproofing, and finishing usually have a much greater effect on the total investment.
Common mistakes include setting the finished-height target too late, forgetting the thickness of the new floor assembly, overlooking drain elevations, and choosing a contractor before the structural concept is reviewed.
Before signing a contract, ask:
- Is the finished ceiling height stated in writing?
- Does the quote identify the excavation depth and slab elevation?
- Are drawings and permit support included?
- Who coordinates engineering reviews and inspections?
- How are unexpected soil or foundation conditions handled?
- Is waterproofing included or excluded?
- Are drains, plumbing, insulation, and heating coordinated?
- How will dust, debris, access, and cleanup be managed?
- Is the contractor insured for underpinning work?
- Does the payment schedule follow clear milestones?
The strongest proposal explains the complete construction sequence and floor assembly, not only the amount of soil being removed.
Increase Basement Ceiling Height With a Complete Plan
Increasing basement ceiling height in an older Toronto home can transform an underused lower level into a comfortable, practical space. The best results come from treating the work as a coordinated structural project rather than a basic renovation.
Underpinning usually preserves the greatest amount of usable floor area because it extends the foundation downward. Benching or a combined approach may still be appropriate where access, neighboring structures, foundation conditions, or budget affect the design.
RockBottom Underpinning specializes in complex residential underpinning, basement lowering, structural reinforcement, waterproofing, and related basement construction in Toronto. The team focuses on engineered planning, organized job sites, and the details required for tight urban properties.
To discuss your current ceiling height, foundation conditions, and renovation goals, visit rockbottomunderpinning.com and request a project assessment.